"The logo looks great on the website, but after printing business cards, it's a disaster – everything is blurry!" We hear this sentence at the print shop several times a week. And each time, the diagnosis is the same: poorly prepared file. Most often, it's about resolution – the famous DPI. But what does it actually mean? And why does an image that looks razor-sharp on a monitor turn into a pixelated disaster in print? Here's a complete guide to DPI, PPI, and resolution – without industry jargon.
DPI vs PPI – We Explain the Difference Once and for All
DPI (Dots Per Inch) – Dots per Inch
This is a unit used in printing. It indicates how many tiny dots of ink a printer will physically apply to one inch (2.54 cm) of paper. The more dots, the smoother and more detailed the image.
Example: A printer with a resolution of 300 DPI will apply 300 tiny dots of ink on every inch of paper. Your eye doesn't see the individual dots – it sees a continuous, sharp image.
PPI (Pixels Per Inch) – Pixels per Inch
This is a unit used for digital images (screens, graphic files). It specifies how many pixels fit in one inch of the image.
The most common mistake? People say "DPI" when referring to both. Designers should use the term PPI (a pixel is not the same as a printer dot), but in practice – both terms are used interchangeably. We'll do the same for simplicity.
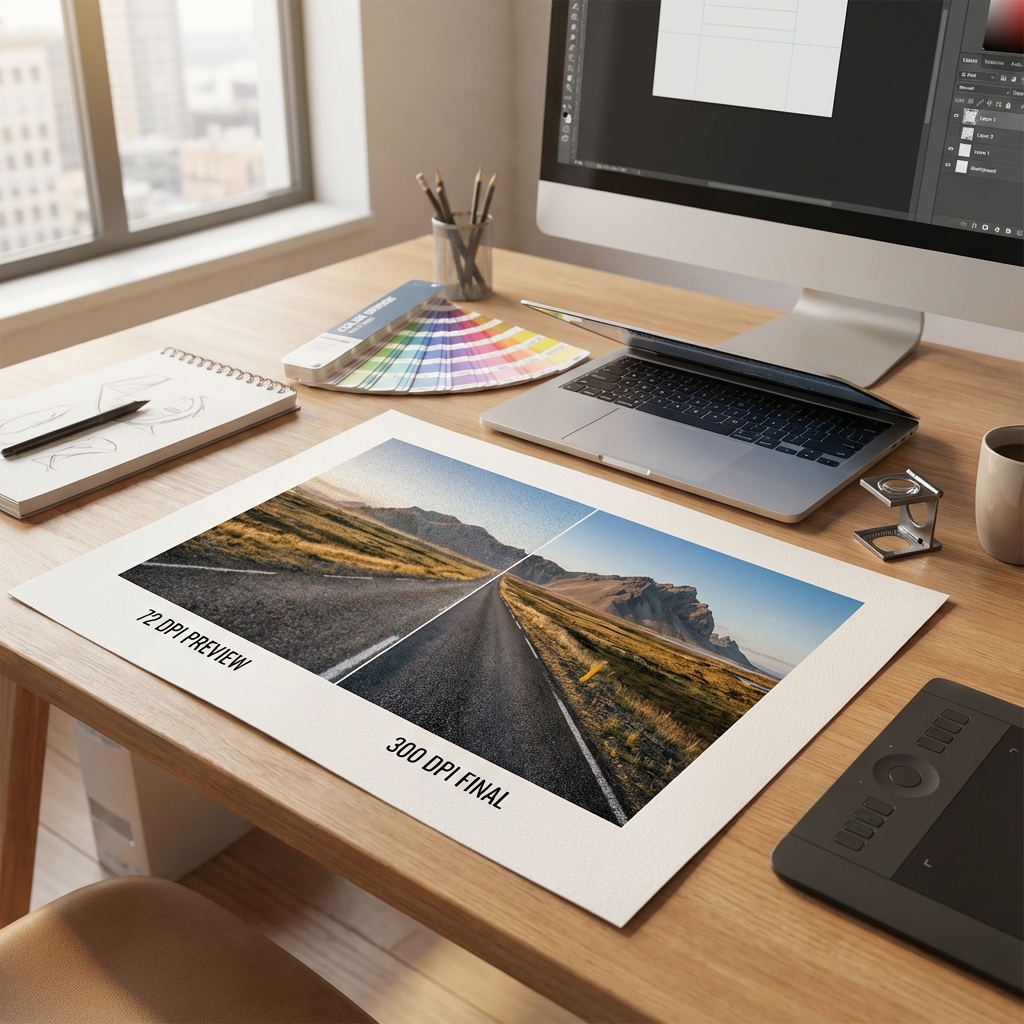
Why 72 DPI is Enough for the Screen but Not for Paper?
Screen ≠ Paper
Your monitor typically has a resolution between 72-120 PPI. This means that an image at 72 DPI on the screen looks perfectly sharp – because that's exactly what the screen can display.
But paper is a physical medium. When you print a 72 DPI image on paper, the ink creates large, visible dots to the naked eye. The result? Pixelation – chessboard effect, blurriness, lack of detail.
Industry Standard: 300 DPI
Why 300? Because it's the threshold at which the human eye stops distinguishing individual dots on paper read from a normal distance (about 25-30 cm).
- 72-150 DPI: Visible pixels. Suitable only for web previews, screen presentations.
- 300 DPI: Standard for most prints (business cards, flyers, brochures, book covers).
- 600+ DPI: For very fine details (e.g., technical lines, microprinting on banknotes, artistic photography).
Quick Test:
Open your photo in Photoshop → Image → Image Size. If you see "72 pixels/inch" and plan to print – red alert! Change to 300 pixels/inch. But beware: just switching isn't enough...
Myth #1: "I'll Change 72 DPI to 300 DPI and It'll Be OK" – DOESN'T WORK!
This is the most common mistake. A client opens an image in Photoshop, sees "72 DPI", changes it to "300 DPI", and thinks the problem is solved. It doesn't work like that.
Why? Because PIXELS Matter, Not DPI
DPI is just a label saying "how many pixels to fit per inch of paper". If you have an image 720 x 720 px and change from 72 DPI to 300 DPI, you still have 720 x 720 px. Photoshop only "divides" the same pixels into a smaller physical area.
Real-life example:
- Image: 720 x 720 px
- At 72 DPI: This image will take up 10 x 10 inches (25 x 25 cm) on paper
- At 300 DPI: The same image will take up only 2.4 x 2.4 inches (6 x 6 cm)
So if you want to print a business card 9 x 5 cm at 300 DPI, you need an image with dimensions at least 1063 x 591 pixels. No less.
Golden Rule: Never "raise" resolution by changing DPI in Photoshop (from 72 to 300). It won't add information – it will only make the image smaller. If the image is too small in pixels, you need to find a new, larger source or take the photo again.
Calculator: How Many Pixels Do I Need?
The rule is simple:
Width in inches × 300 = width in pixels
Height in inches × 300 = height in pixels
Practical Examples:
| Product | Dimensions (cm) | Minimum in pixels (300 DPI) |
|---|---|---|
| Business Card | 9 × 5 cm | 1063 × 591 px |
| A5 Flyer | 21 × 14.8 cm | 2480 × 1748 px |
| A3 Poster | 42 × 29.7 cm | 4961 × 3508 px |
| Billboard 3×2m | 300 × 200 cm | 150 DPI is enough! (17717 × 11811 px) |
*For large format prints (banners, billboards) 150 DPI is sufficient, as they are viewed from a distance.
Myth #2: "I'll Download the Logo from Google Images" – STOP!
Client: "But I have the logo on the website, I'll download it from there".
Us: "Please don't."
The logo on the website is optimized for 72 DPI. It usually has a width of 200-400 px. If you print this on a business card, it will look like a Minecraft mosaic.
What to Do?
- Ask the designer for a source vector file (AI, EPS, vector PDF, SVG)
- If you don't have it – ask for export at 300 DPI in the target size
- As a last resort: use AI tools for upscaling (e.g., Topaz Gigapixel, waifu2x) – but it's still worse than the original
Vectors – Your Best Friend
Did you know that vector graphics don't have DPI at all? That's why a company's logo should ALWAYS be saved as a vector (e.g., in Adobe Illustrator, CorelDRAW).
What is a Vector?
It's a graphic based on mathematical equations, not pixels. You can enlarge a vector to billboard size and it will still be sharp. Because the computer simply "calculates" the curve to a larger size.
Vector Formats: AI, EPS, PDF (with vectors preserved), SVG
Raster Formats (pixel-based): JPG, PNG, GIF, BMP, TIFF
Rule:
Logo = always vector. Photos = always raster at 300 DPI. Text = preferably vector (editable PDF). If you receive a project in JPG/PNG – that's a red flag. Ask for source files.
Common Mistakes and How to Avoid Them
1. Screenshot as Print Material
Problem: The client takes a screenshot of their website (Cmd+Shift+4 on Mac) and sends it for printing.
Resolution: Usually 144 DPI (Retina) or 72 DPI (old monitors).
Effect: Pixelation.
Solution: Export graphics directly from the source file, don't take screenshots.
2. Enlarging a Small Image in a Graphic Program
Problem: I have a photo 500×500 px, I'll enlarge it in Photoshop to 3000×3000 px.
Effect: Photoshop will "add" pixels (interpolation), but invent them. The image will be blurry, artificial.
Solution: Use images of the correct resolution from the start. AI upscaling can help, but it's a hack, not a standard.
3. Converting JPG → PDF and Thinking "PDF Means Print"
Problem: Saving a 72 DPI JPG as a PDF doesn't change its resolution.
Effect: Still 72 DPI, just in a different format.
Solution: PDF is a container. Content matters. Make sure the images inside the PDF are at 300 DPI.
Checklist Before Sending to Print
-
Check image resolution:
Photoshop → Image → Image Size → Make sure "Resolution" = 300 Pixels/Inch -
Check dimensions in pixels:
Does the image have enough pixels for the target print size? (See the table above) -
Logo in vector?
AI, EPS, PDF (vector) or SVG file? If not – ask the designer for export. -
CMYK color mode?
(This is a topic for another article, but briefly: RGB = screen, CMYK = print) -
Bleeds?
Graphics should be 3mm larger on each side to avoid white edges after trimming.
Real Story: We received an order for 10,000 flyers. The client sent the file. The designer noticed that the logo was at 72 DPI. We called – the client said: "But it looks great on my monitor!". We had to explain that the monitor is not paper. Eventually, they found a vector logo and avoided disaster. We always check files before printing – that's our role.
Summary: Your DPI Cheat Sheet
- 72 DPI = Screen, websites, presentations
- 150 DPI = Large format banners, posters viewed from a distance
- 300 DPI = STANDARD for print (business cards, flyers, brochures, covers)
- 600 DPI = Very fine details, technical lines, artistic photography
- Vectors (AI, EPS, PDF, SVG) = Don't have DPI, scale without loss
Golden Rule: If in doubt – ask the printer before placing an order. Checking the file takes us 2 minutes. Reprinting after an error – 2 weeks and additional costs.
Need a Professional Graphic Design?
Fill out the form – we will prepare an innovative design for your company, ready to print in the highest quality.
Order Design